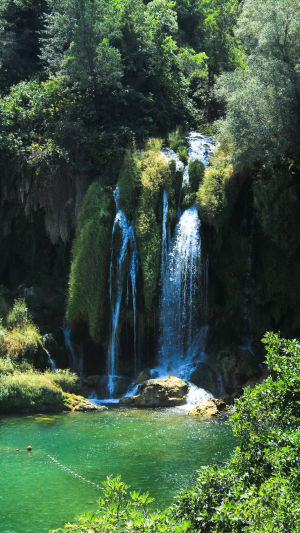
Hello Lykkers! Waterfall photography captures the beauty and power of nature, attracting both novice and experienced photographers alike. Waterfalls offer stunning and dynamic scenes, making them a favorite subject for landscape photographers.
This article will provide you with essential tips, techniques, and advice to capture waterfalls at their best. Let’s dive in!
<h3>1. The Right Equipment for Waterfall Photography</h3>
To get the most out of your waterfall shots, having the right equipment is key. Depending on your shooting style, here are the essential tools you should carry:
<b>Tripod</b>
A tripod is crucial for stability, especially when using slow shutter speeds. It ensures your composition is precise, allowing you to capture long exposure shots to smooth out the flowing water.
<b>Wide-Angle Lens</b>
A wide-angle lens is essential to capture the full scale of a waterfall and its surrounding landscape. By positioning yourself close, you can include both the waterfall and the surrounding scenery, creating a dynamic shot.
<b>Telephoto Lens</b>
A telephoto lens is ideal for focusing on specific parts of the waterfall, such as the force of the water or unique details. This allows you to capture more intimate, close-up shots.
<b>Polarizer Filter</b>
A polarizer filter helps enhance the colors in the water, making it clearer and more vibrant. It also reduces reflections on the water surface, which is especially useful if you're photographing a pool at the base of the waterfall.
<b>ND Filter (Neutral Density)</b>
An ND filter is important if you're shooting during daylight with long exposure times. It reduces the light entering the lens, allowing for slower shutter speeds even in bright conditions, and helps prevent overexposure.
<b>Additional Gear</b>
Always carry a plastic bag to protect your camera from splashes, and a cloth to dry your lenses. These will ensure that your gear stays clean and dry, especially in wet environments like near waterfalls.
<h3>2. Timing Your Shots</h3>
The right timing can make a significant difference in waterfall photography.
<b>After a Storm</b>
Waterfalls are most dramatic right after a storm. The extra rainfall increases the flow and power of the water, resulting in more impressive scenes.
<b>Golden Hours</b>
The best times to photograph waterfalls are during the golden hours—either early morning or late evening. The soft, warm light during these times enhances the natural beauty of the scene, creating less harsh shadows and more even exposures.
<b>Avoid Crowds</b>
Arriving early not only allows you to capture the perfect light but also helps you avoid crowds. This gives you the opportunity to find the best vantage points without other people in your frame.
<h3>3. Capturing the Silky Water Effect</h3>
One of the most enchanting aspects of waterfall photography is the silky, smooth effect of flowing water, achieved through long exposure techniques.
<b>Using a Slow Shutter Speed</b>
To create the silky water effect, set your camera to a slow shutter speed (between half a second to several seconds). A tripod is necessary to stabilize the camera and avoid any blur caused by hand movement.
<b>Settings for Beginners</b>
If you’re new to this technique, set your camera to shutter priority mode. Keep your ISO as low as possible to reduce noise. Experiment with shutter speeds between 1-4 seconds to capture the flowing water.
<b>Advanced Settings</b>
For those more comfortable with manual mode, experiment with different aperture settings to control depth of field. A smaller aperture (higher f-stop) will allow longer exposures, while a larger aperture (lower f-stop) can create a shallow depth of field.
<b>Use an ND Filter</b>
If you’re shooting in bright conditions, you may need an ND filter to avoid overexposure. It reduces the amount of light entering the lens, enabling you to use longer exposure times without the image becoming too bright.
<h3>4. Freezing the Water’s Motion</h3>
For waterfalls with fast-moving water, freezing the motion can produce striking images that showcase the power and energy of the scene.
<b>Fast Shutter Speed</b>
Use a fast shutter speed (at least 1/500th of a second or faster) to freeze the water’s movement. This technique works well for large waterfalls where the water is falling quickly and creating dramatic splashes.
<b>Using Bracketing</b>
To ensure proper exposure, use bracketing, which involves taking multiple shots with varying exposure settings. This allows you to capture the ideal exposure range and merge the images later for a more dynamic result.
<h3>5. Composition Tips for Stunning Shots</h3>
Good composition is key to making your waterfall photos stand out.
<b>Framing Your Shot</b>
You can either isolate the waterfall as the main subject or capture it within a larger landscape to provide context. Consider using leading lines (like the flow of water) to guide the viewer’s eye through the frame.
<b>Depth of Field</b>
To isolate the waterfall, use a shallow depth of field by opening up your aperture. For wider landscape shots, increase the depth of field by using a smaller aperture to keep everything in focus.
<b>Rule of Thirds</b>
The rule of thirds is a great compositional tool. Position the waterfall off-center for a more dynamic composition. Pay attention to both the foreground and background elements to create a balanced shot.
<h3>6. Take Time to Observe</h3>
Perhaps the most important advice is to take a moment to truly observe the waterfall before taking your photo. Walk around the area to explore different perspectives and compositions. This allows you to choose the most compelling angle and ensure you capture the scene’s essence.
<h3>In Conclusion</h3>
Waterfall photography can be incredibly rewarding when done correctly. With the right equipment, timing, and techniques, you can capture the magic of flowing water and its surrounding landscape. Whether you’re using long exposures to create a silky effect or freezing the motion for a powerful shot, always remember to take your time and appreciate the scene. Happy photographing, Lykkers!


